Intercom
Door intercom to door release: relays and fail-safe
On this page
- What actually opens the door — what should you know?
- What the documented hardware offers — what should you know?
- The relay inside the panel — what should you know?
- Fail-safe or fail-secure — what should you know?
- Power for the strike — what should you know?
- Inputs: exit button, door contact, alarm
- Credentials and controllers
- Commissioning tests
What actually opens the door — what should you know?
The intercom does not open a door. It closes a contact, and something else - a strike, a magnetic lock or a controller - does the work. Almost every door-entry fault that gets reported as "the intercom is broken" is a mismatch somewhere in that chain, and the chain is short enough to check one link at a time.
The links are: the panel decides to release, usually after a call to an extension or a valid credential; the panel's relay or output closes; the lock's power circuit is made or broken; and the door physically releases. Each link has one fact you need before the next one can be designed.
What the documented hardware offers — what should you know?
| Device | Release-related interfaces stated | Other facts worth having |
|---|---|---|
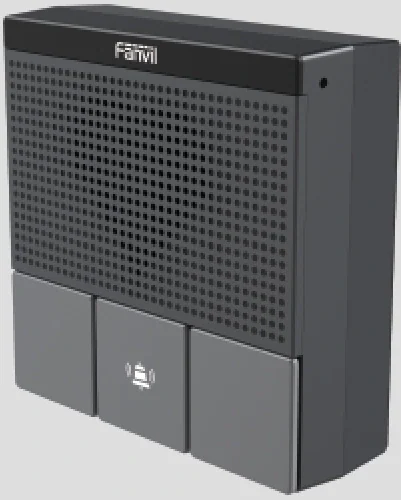
| A10W mini intercom | One built-in relay, plus one short-circuit input and one short-circuit output | Fits a standard 86 box; PoE, or 12 V/1 A DC documented; two SIP lines; IP54 |
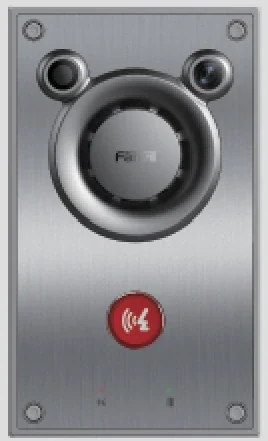
| A12V outdoor intercom | One access control channel; two short-circuit inputs and two short-circuit outputs | IP66, IK10, minus 40 to 70 degrees C; 10W speaker with echo cancellation; anti-tamper alarm reported to the control centre |
| i67 face recognition terminal | Access by face, IC/ID card, PIN, QR code, DTMF and app; Wiegand interface | 7-inch touchscreen; two 2 MP cameras with fill light; 3W speaker; ONVIF; IP66 and IK07 |
| EC20 elevator access controller | 64 outputs expandable to 128 over RS485 and Wiegand 26/34 | Configured over web software; communicates with the door terminals over HTTP commands; calls the lift ahead of arrival |
Notice what the table does not contain: contact ratings, lock types, lock power and release times. Those are not stated in the product documentation for these panels, which is why the lock circuit is confirmed per project on the quotation rather than assumed from a brochure.
The relay inside the panel — what should you know?
A built-in relay is a switch, and the first question is what it switches:
- A dry contact simply makes or breaks a circuit that someone else powers. The lock or its controller supplies the current, and the panel only decides when.
- A powered output supplies the release current itself, which limits it to the load the panel was built for.
Which one applies to a given panel is exactly the kind of detail that must be read from the documentation or confirmed with the manufacturer - and it decides whether the lock needs its own power supply at the door. Design the lock circuit assuming the panel is a switch, and the question of the lock's supply answers itself.
Fail-safe or fail-secure — what should you know?
These two terms are the most misunderstood part of door hardware, and getting them backwards is a safety issue rather than a convenience one.
- Fail-safe means the door unlocks when power is removed. The electric strike or lock is held locked by current, so power loss releases it. It is the usual choice on escape routes, because a fire or a power failure must not trap people inside.
- Fail-secure means the door stays locked when power is removed - the classic choice for a secure store, a plant room or a perimeter gate, where an open door is the greater risk.
Neither is better in the abstract, and neither is a product feature in this range: it is a property of the lock and its wiring, and it is decided by the building's fire strategy and the applicable local code. The rule that keeps projects out of trouble is that the same door's intercom release and its emergency egress have to be designed together, by whoever owns the fire strategy - not by the access-control supplier alone.
Power for the strike — what should you know?
Three power arrangements are common, and the survey should record which one applies:
- Lock powered from the panel's location, with the panel's relay cutting the circuit. The cable to the door then carries lock current as well as the panel's data or pair.
- Lock powered locally at the door, with only the switching pair running back. This is the arrangement that keeps volt drop out of the design over long runs.
- Lock powered from an access controller that also handles the exit button, the door contact and, where required, the fire alarm release.
Whichever it is, two figures belong in the design: the lock's steady current and its inrush. Neither is stated in the intercom material, so both come from the lock supplier - and an inrush figure that was never written down is the usual reason a release works on the bench and buzzes on the door.
Inputs: exit button, door contact, alarm
The short-circuit inputs on these panels are not only for alarms. On the A10W and the A12V they are the documented way to bring outside contacts into the system, which is how the following get wired:
- A request-to-exit button on the inside, so staff leaving do not need to call the door.
- A door contact, so the system knows whether the door actually opened - the difference between a release that worked and a release that closed a contact nobody noticed.
- An alarm or tamper circuit. The A12V reports an anti-tamper alarm to the control centre, and the indoor station family takes eight alarm inputs plus an embedded relay for external fire and gas alarms.
Credentials and controllers
Where the door needs more than a call-and-release, the split is worth understanding. Panels in the face-recognition range hold their own credential list and their own decision logic, offering face, card, PIN, QR, DTMF and app access, and they carry the Wiegand interface that lets a separate controller read the same credential. The EC20 takes that further at building scale: 64 outputs expandable to 128, over RS485 and Wiegand 26/34, configured over web software. Pick the split deliberately, and note that DTMF is the bridge between the two worlds: a caller can press a code during an intercom call to open the door without any card at all.
Commissioning tests
- Call the panel from an extension and release the door from the answering phone; repeat from outside the network.
- Release from every credential the panel offers, including the DTMF code, with the door closed and locked.
- Release the door ten times in a minute and check nothing overheats - inrush problems show up under repetition.
- Remove power and confirm the door does what the fire strategy says it should.
- Press the exit button and confirm the release, then hold the door open and confirm the door contact reports it.
- Confirm the tamper or alarm input reaches the position that is supposed to see it.
- Record the release time and the relay behaviour, because the next engineer will ask.